Outlook for Android
Initial Configuration
- Instructions to configure Outlook for Android
- (Archived) Instructions to configure the native mail app for Android
Quick Tips
Tutorials
- Settings
- Search (Contacts, Mail, Files...)
- Calendar
- Contacts
Feedback
Instructions to configure Outlook for Android
-
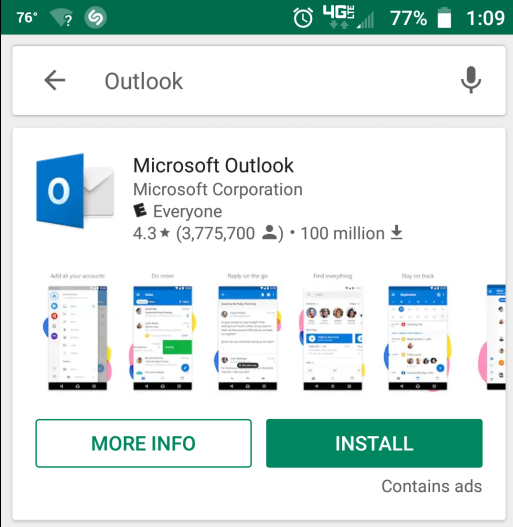
Go to Google Play store and search for “Microsoft Outlook” and select the “INSTALL” button
-
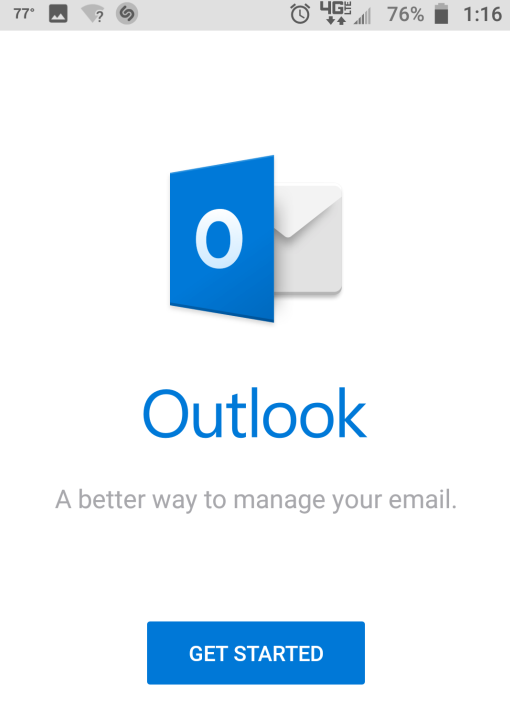
- Once Outlook is installed, open the application and click on the “GET STARTED” button.
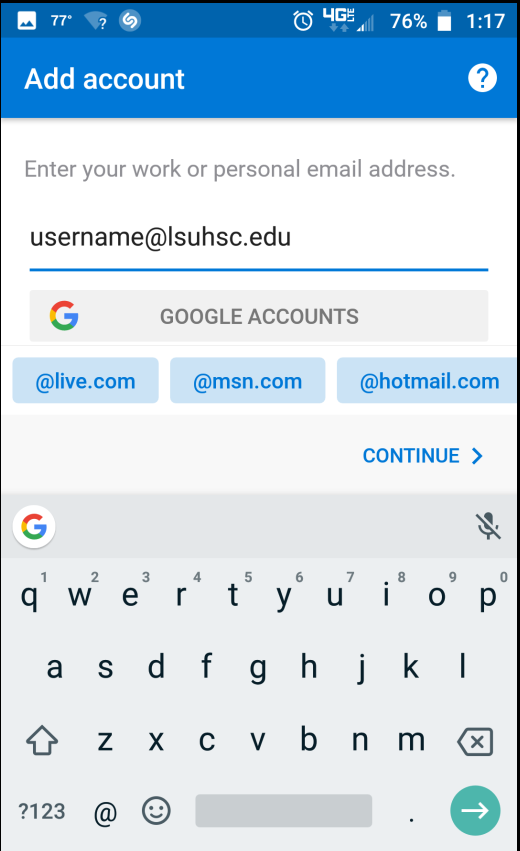
- On the “Add account” screen, enter your full @lsuhsc.edu email address and hit “CONTINUE
>”
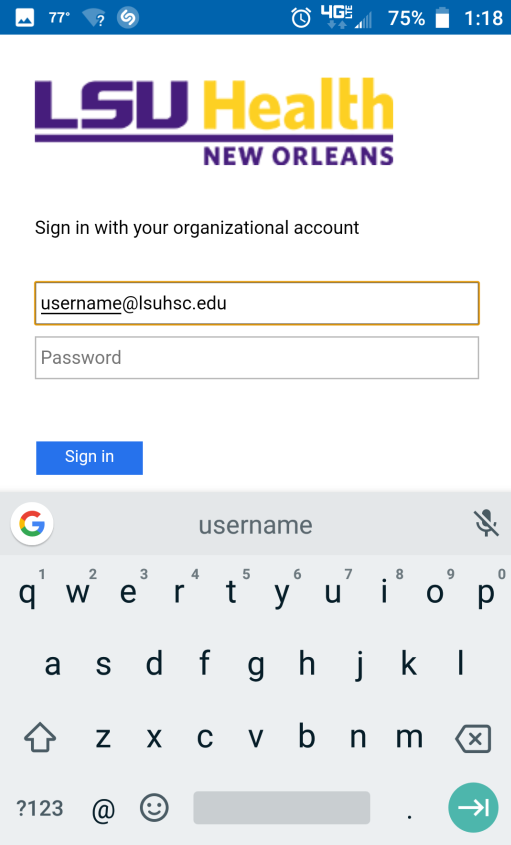
- You will see the LSU Health New Orleans page asking that you sign in with your organizational
account. Use your LSUHSC email address and your password.
- If you are enrolled in Multi Factor Authentication, you will need to confirm your
access (phone confirmation or fingerprint).
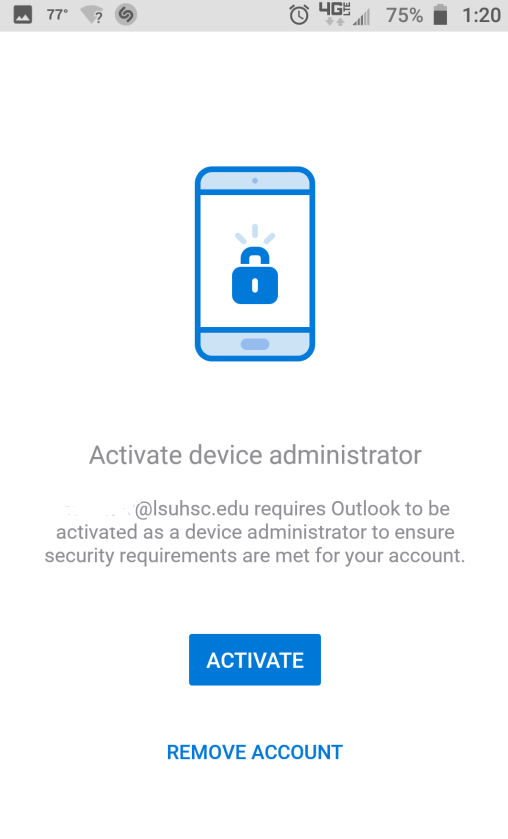
- Activate Device Administrator - If you wish to receive LSUHSC email on your device,
the app needs to be a Device Administrator. This will allow the ability to remotely
wipe your device if it is lost or stolen. Click “Activate” to set this up. (Your
full email address will appear below “Activate device administrator”).
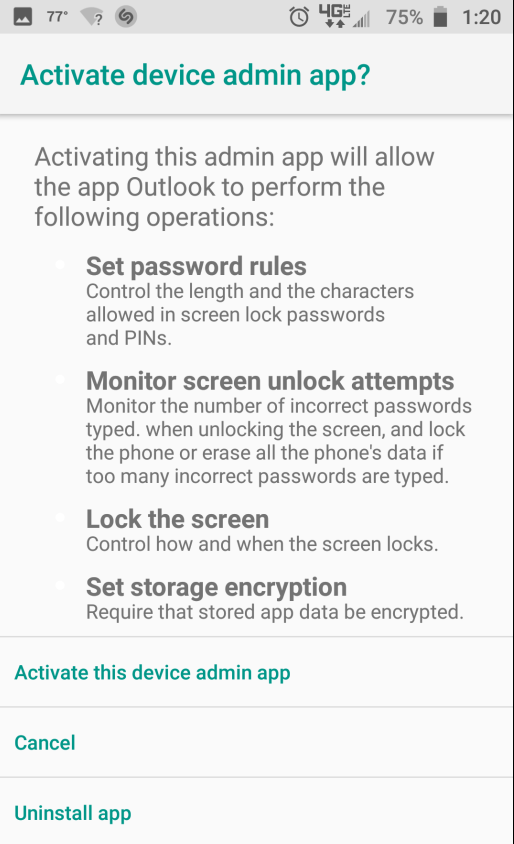
- The next screen will define what a device admin app allows. Read this screen and
select “Activate this device admin app”.
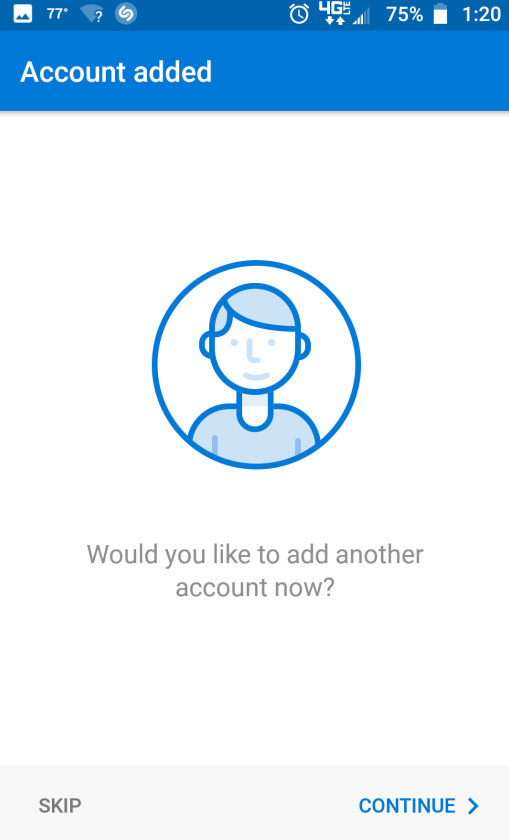
- Click “SKIP” unless you want to add another account.
- The next few screens are informational screens about focused inbox, calendar and search.
Read over the screens and tap the check mark.
- You will finally see a message that you have completed the installation.
- Follow Instructions to save Outlook contacts to your mobile device Until those steps are performed, Outlook for Mobile will not synchronize contacts
to your phone.


Settings and Preferences
Focused Inbox and Organize by Thread
- Focused Inbox separates your inbox into two tabs - Focused and Other.
- Your most important email messages are on the Focused tab while the rest remain easily accessible - but out of the way - on the Other tab.
- "Focused Inbox" can be trained to know what is important to you
- "Organize mail by thread" will group your messages by topic thread instead of just displaying them sorted by arrival time
- To configure either of these, select the hamburger menu
 in the upper left corner of the screen.
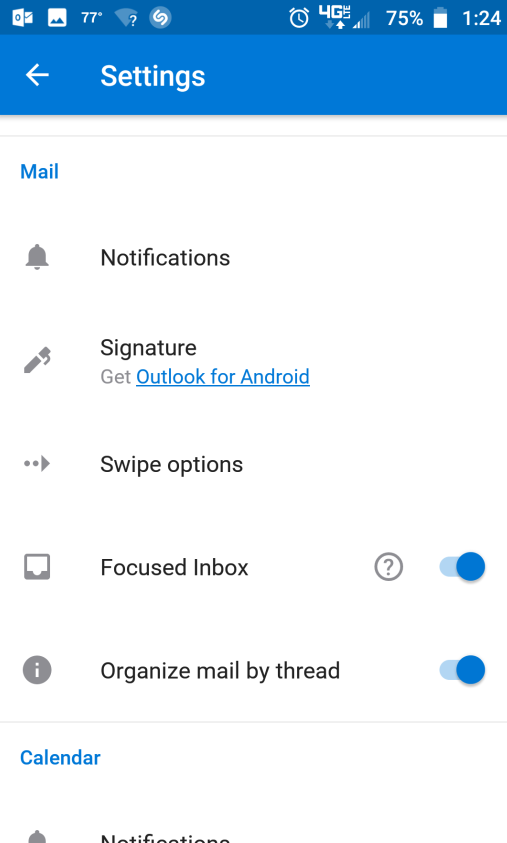
 - Select the gear icon in the lower left hand corner of the next screen to pull up the Settings page.
- In the "Mail" section of Settings page, switch the toggle for “Focused Inbox” to on (blue) or off (grey)
- Switch the "Organize mail by thread" to on (blue) or off (grey)
- Click the “←“ when done
Configure an Out of Office Message
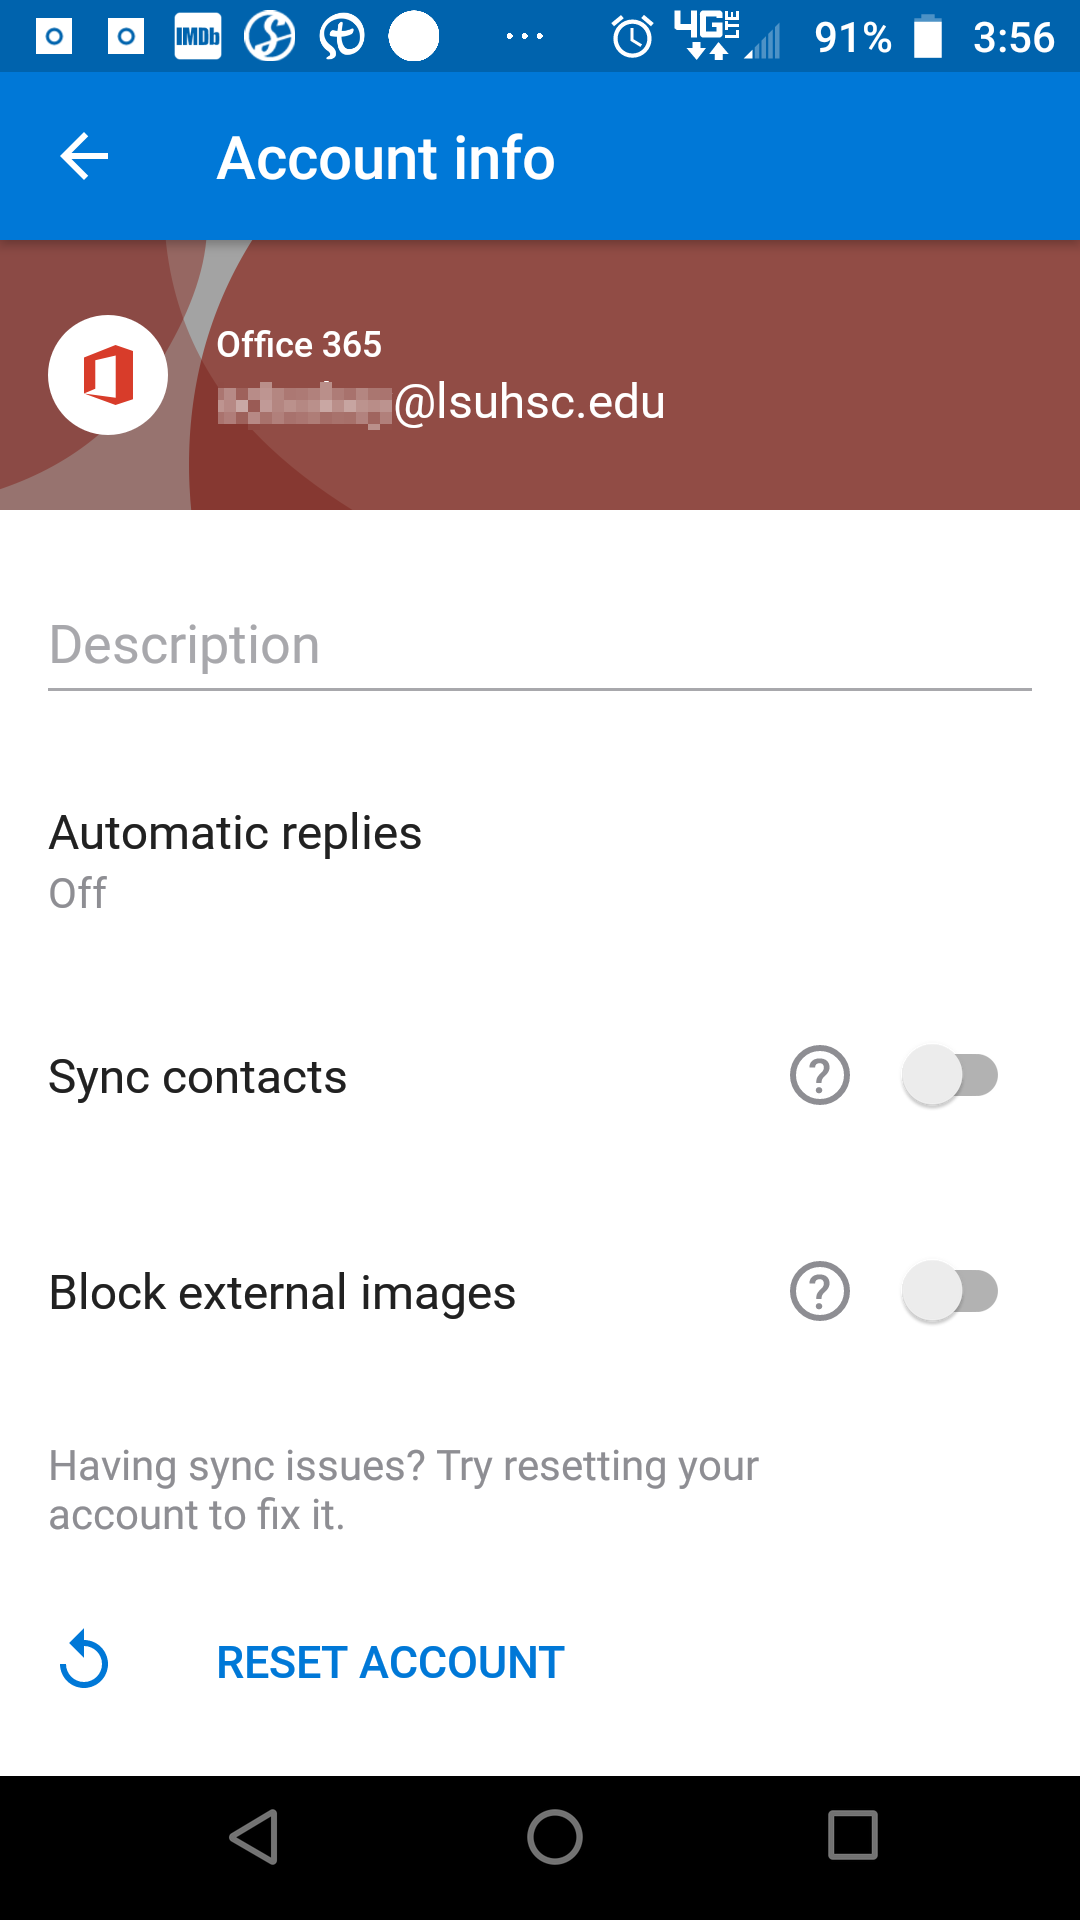
- Select the hamburger menu in the upper left hand corner of the screen.
- Select the gear icon in the lower left hand corner of the following screen.
- On the Settings screen under the "Accounts" section select your username@lsuhsc.edu Office 365 account.
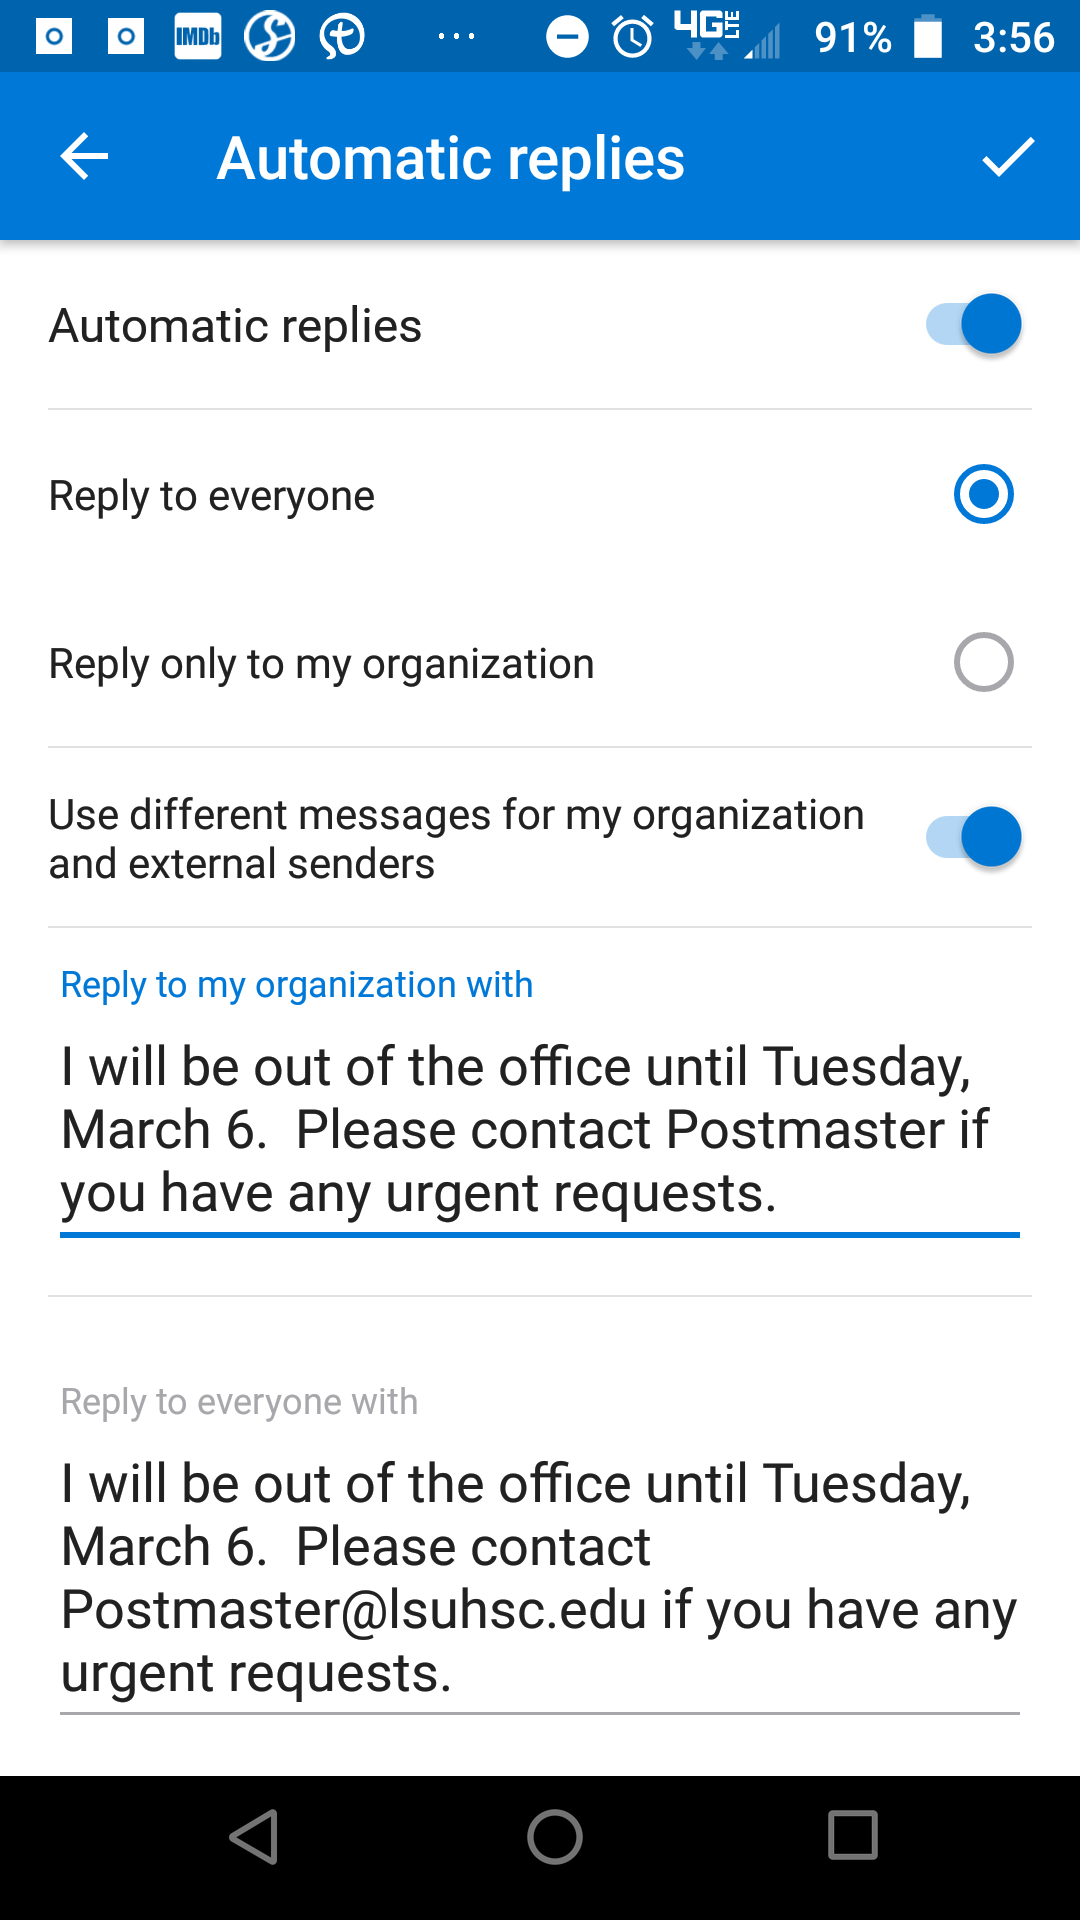
- Select "Automatic replies" to configure this option
- On the next screen toggle the switch for “Automatic Replies” to ON and the configuration options will be displayed
- Select “Reply to everyone” or "Reply only to my organization"
Note: if you select "Reply to everyone", you can setup different messages for your organization and for external senders - Setup your messages under “Reply to my organization with” and/or “Reply to everyone with”
- When you are finished, click the Check mark in the upper right corner to confirm your change
Add a Signature to Emails
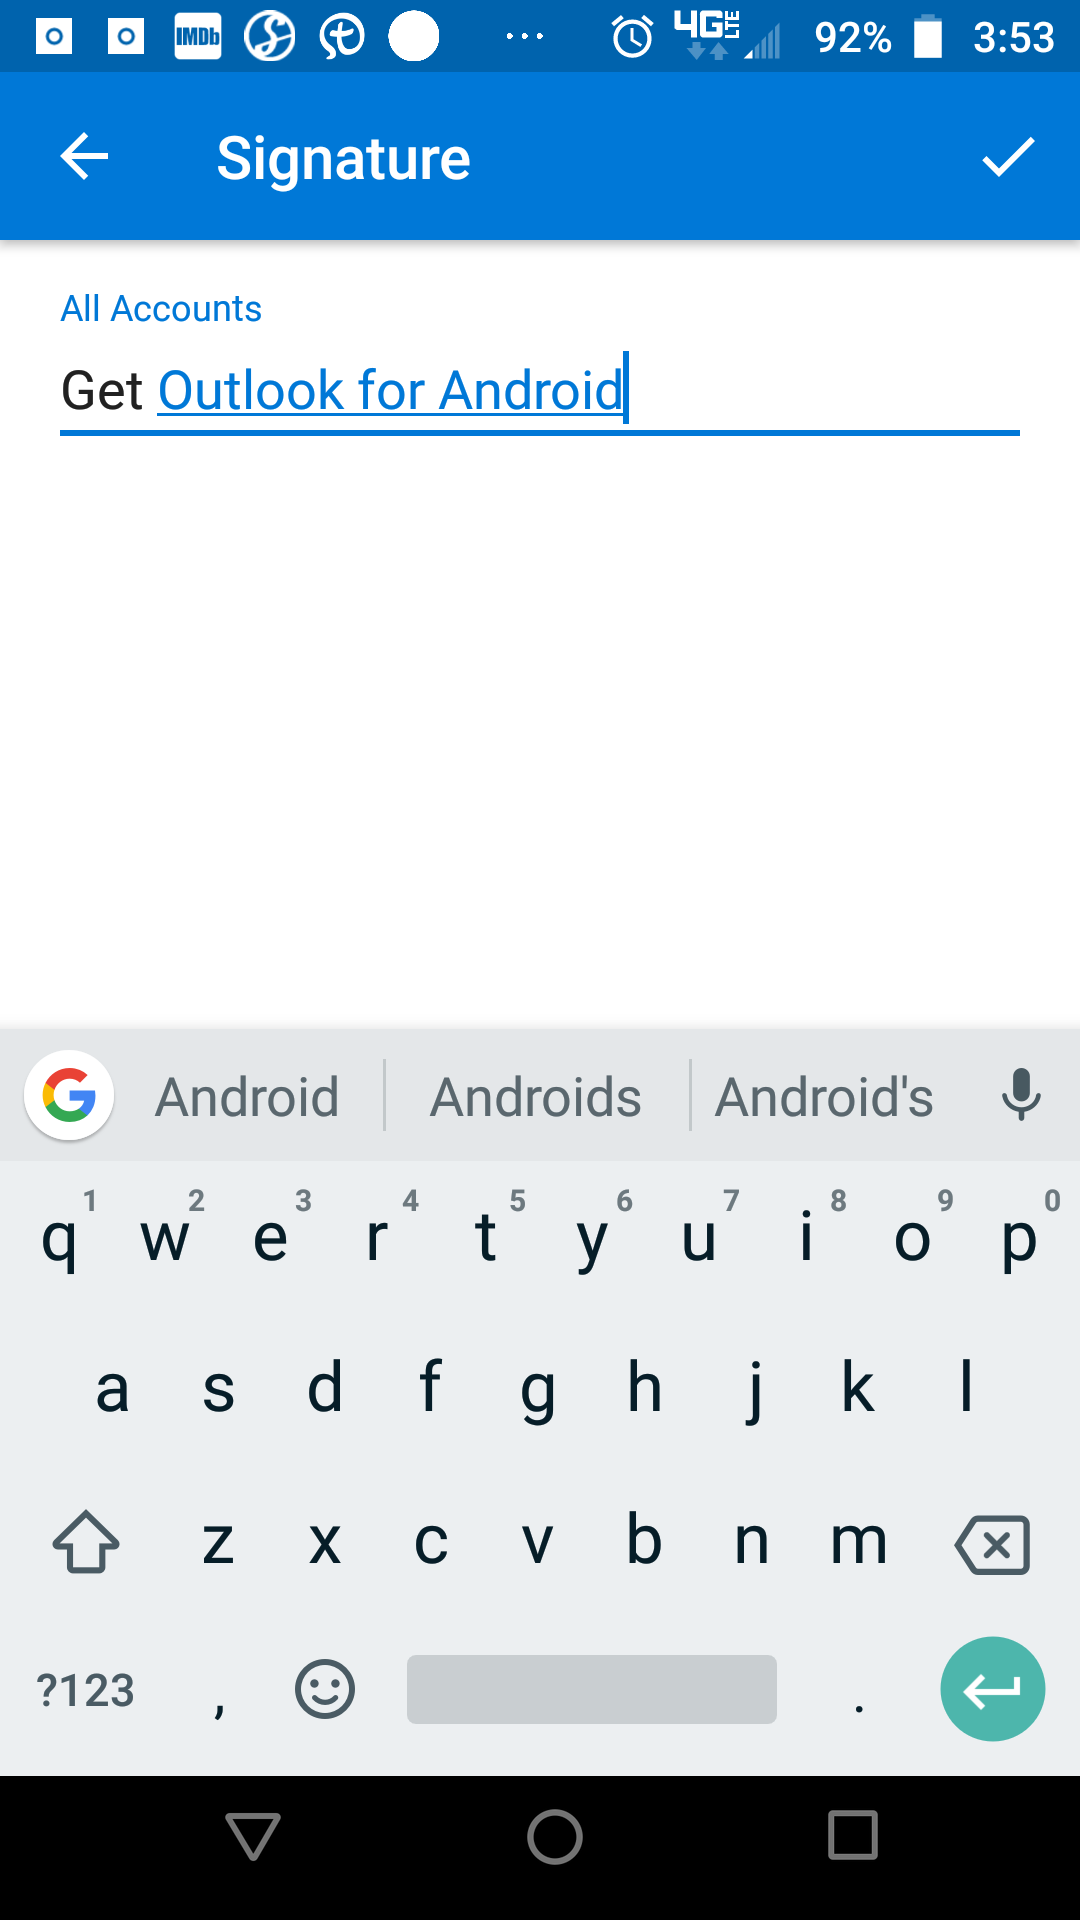
- Select the hamburger menu in the upper left hand corner of the screen
- Select the gear icon in the lower left hand corner of the following screen.
- Under the “Mail” section select the “Signature” setting
- Type what you would like for your signature to be. In this example the signature is "Get Outlook for Android"
- When you are finished, click the Check mark in the upper right corner to confirm your
change
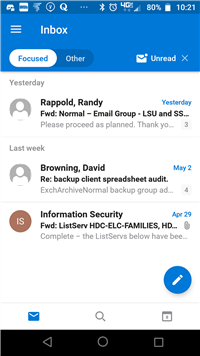
- At the bottom of the main screen from left to right are 3 icons, mail, search and calendar.
- When the mail icon is selected, it will display the mail items in the current folder.
- Click the name of the folder (for example Inbox) to see a list of other folders.
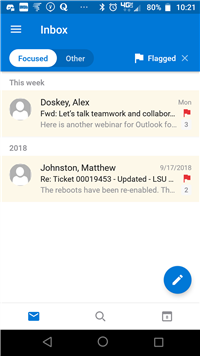
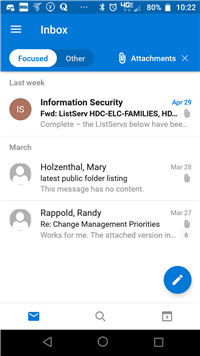
- The “Filters” menu in the upper right hand corner can filter your view.
- There are 4 options available from the Filters dropdown menu: 1) All messages 2) Unread
Messages 3) Flagged Messages and 4) Attachments
Mail Menu - Filter Dropdown Menu 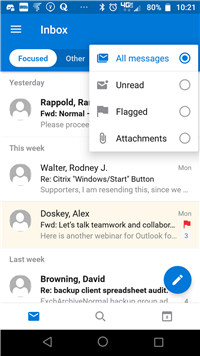
- Unread Messages
- Flagged Messages
- Attachments
Compose Email, Reply and Forward
- To compose a message, click on the Pencil icon at the bottom right of the screen
- In the To and CC fields, start typing names or email addresses, and matching names will be suggested
- Enter your Subject line and the body of the message
- Click the paperclip icon to attach files - attachments you have sent before, or from your One Drive for Business files
- Select the white "Send" arrow
 to send your message
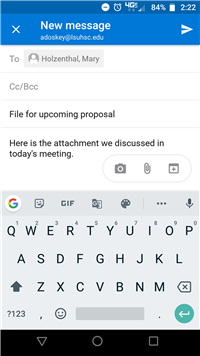
- Reply, Reply to All, Forward
- When reading a message, click on the Reply Arrow in the bottom left of the message
- You can choose to Reply, Reply all, Forward, or Edit Recipients
- Compose your message and click the "Send" arrow to send your message
Search (Contacts, Mail, Files...)
Search Functionality
- The middle icon at the bottom of the main screen, the magnifying glass, is the search
icon, to locate contacts, mail, and files.
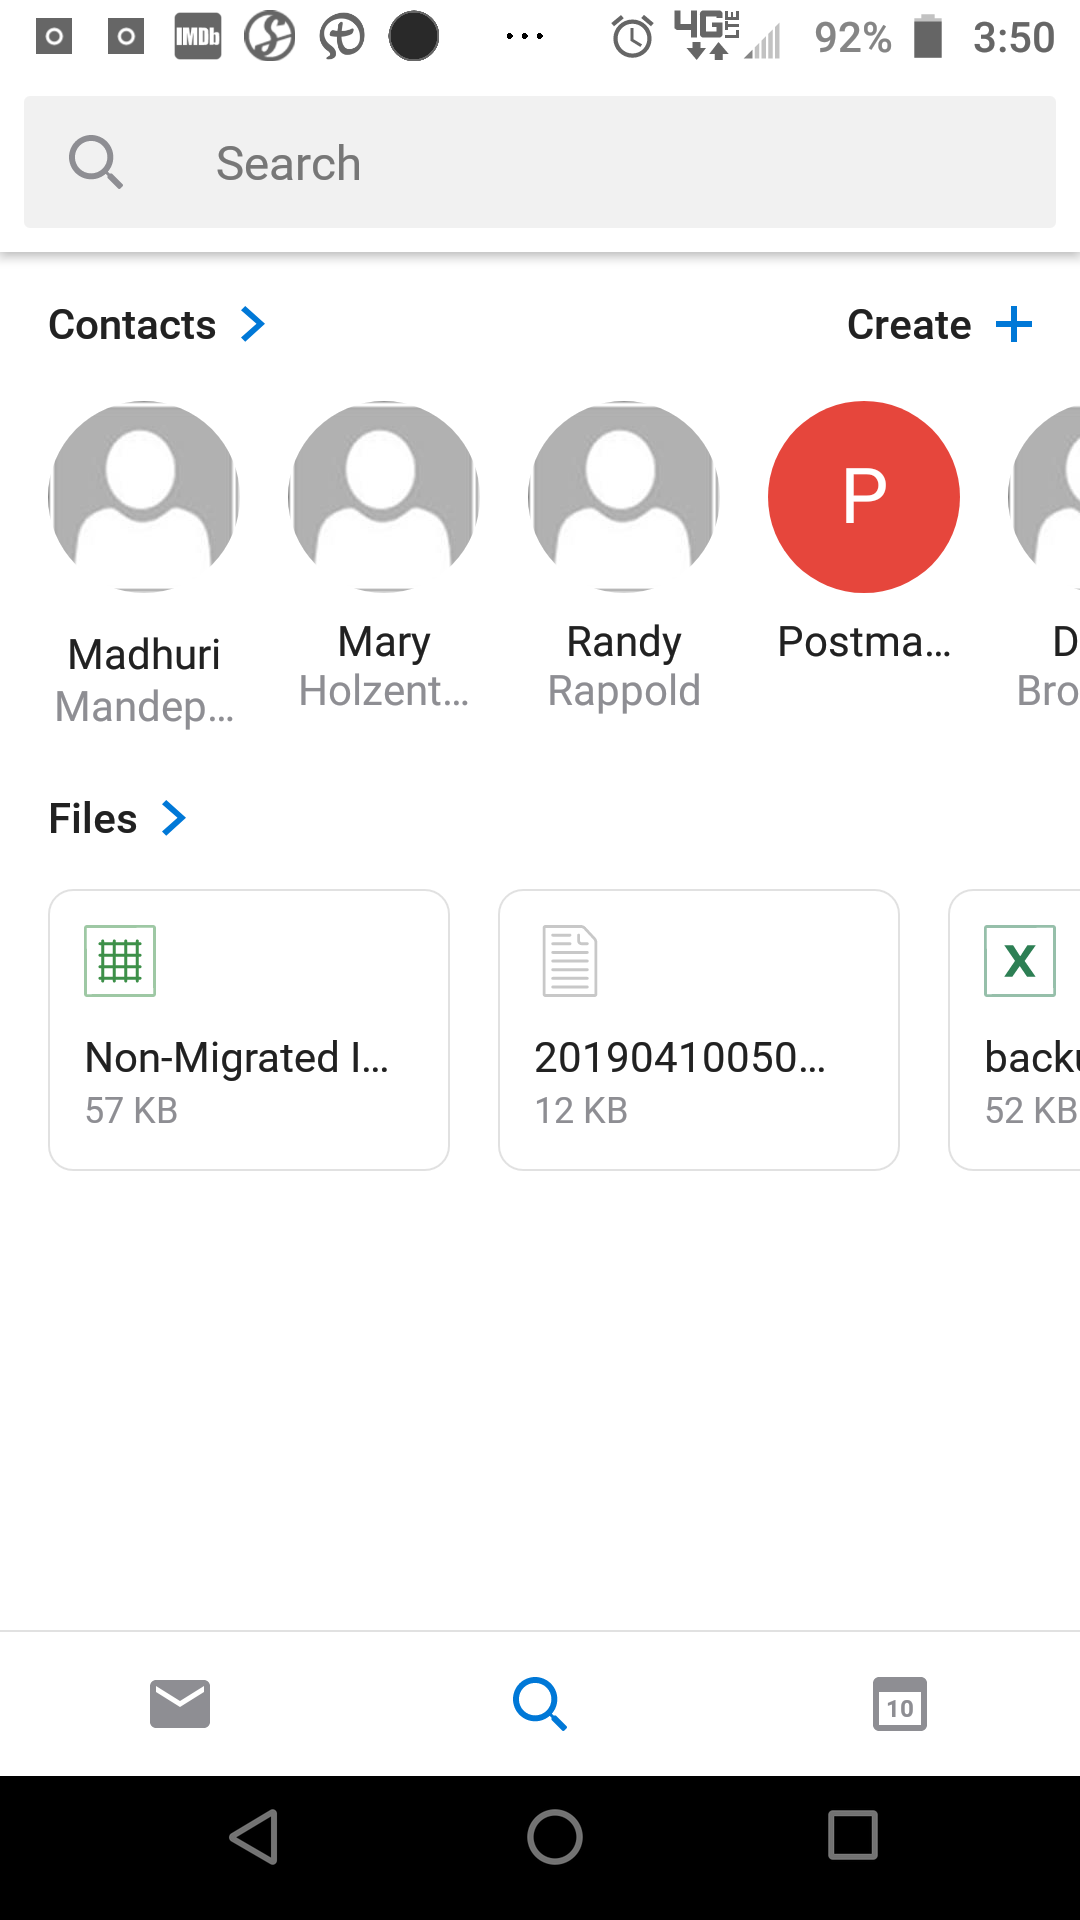
- For example: If the username "mmande" is entered in the search criteria above the search results below would appear.
- Instead of typing a username, a full name could be entered or one of the named icons of a recent Contact could be selected.
- Addresses from both the Global Address List and your personal Contacts folder will be searched.
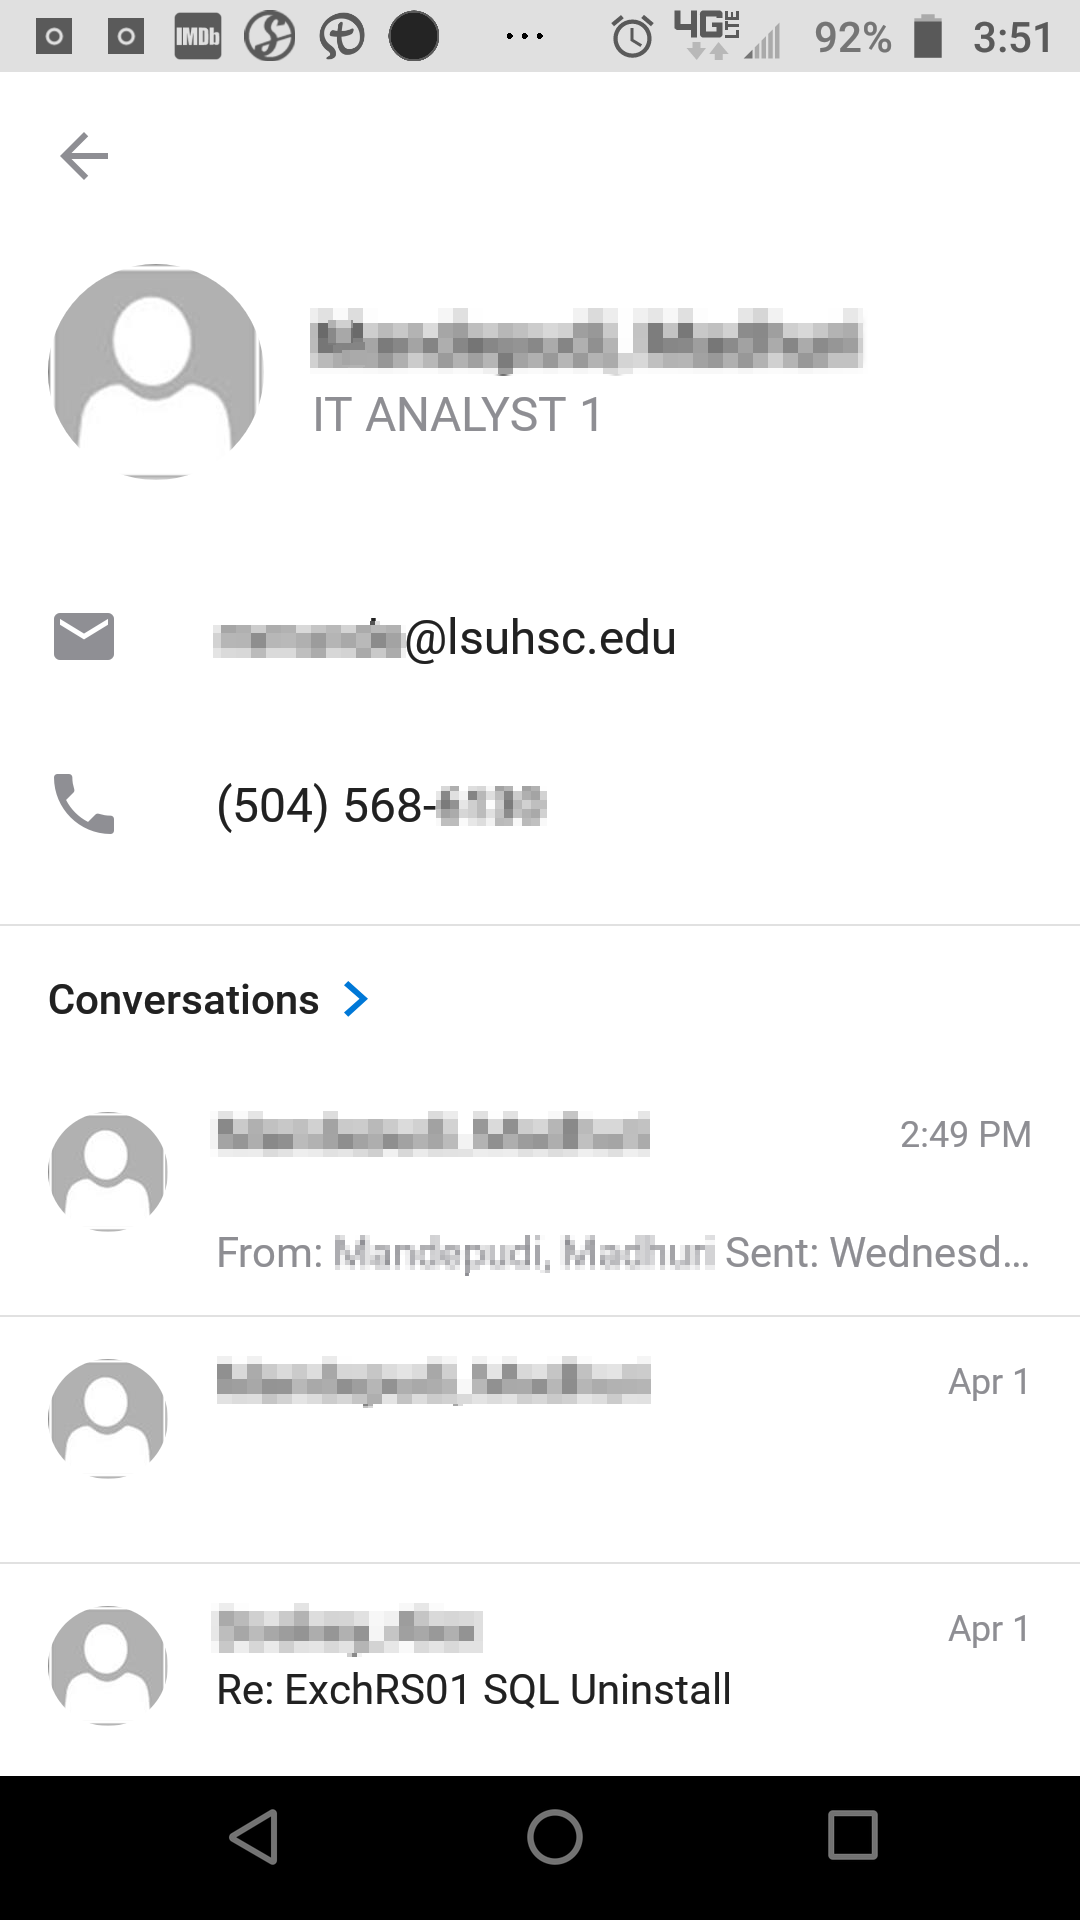
- Search results will list the names and email addresses that match. Select the desired Contact.
- The next screen will list a brief Contact summary, email messages with that Contact, events including this contact and files shared with this contact.
- Clicking on the user's name will expand the Contact information, and display Contact information, emails and attachments shared.
- Select "More Info" under the contact information to view additional Contact details.
- Select the arrow next to "Conversations" to browse through all emails involving you and this contact.
- Select the arrow next to "Attachments" to browse through all files shared between
you and this contact.
- From the main seach screen, you can create a new Contact in your personal Contacts folder by clicking the "Create +" in the top right
- You can manually add a Contact, or if supported by your phone, Scan a business card
Calendar
Calendar Functionality
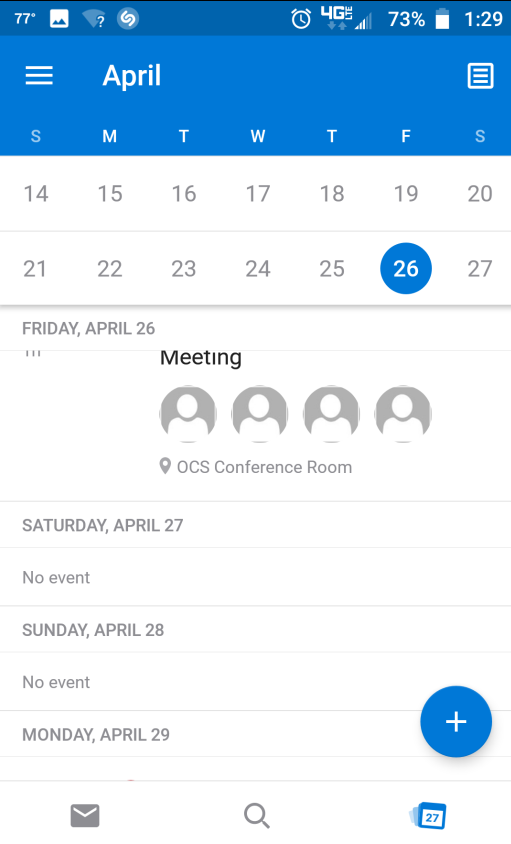
- The icon on the bottom right of the main screen is the Calendar icon. View the calendar to display scheduled meetings and appointments.
- New entries can be added by clicking on the "+" icon on the bottom right of the screen.
- A "New Event" screen will show requesting a title, people, date and time, location,
description, alert and other options.
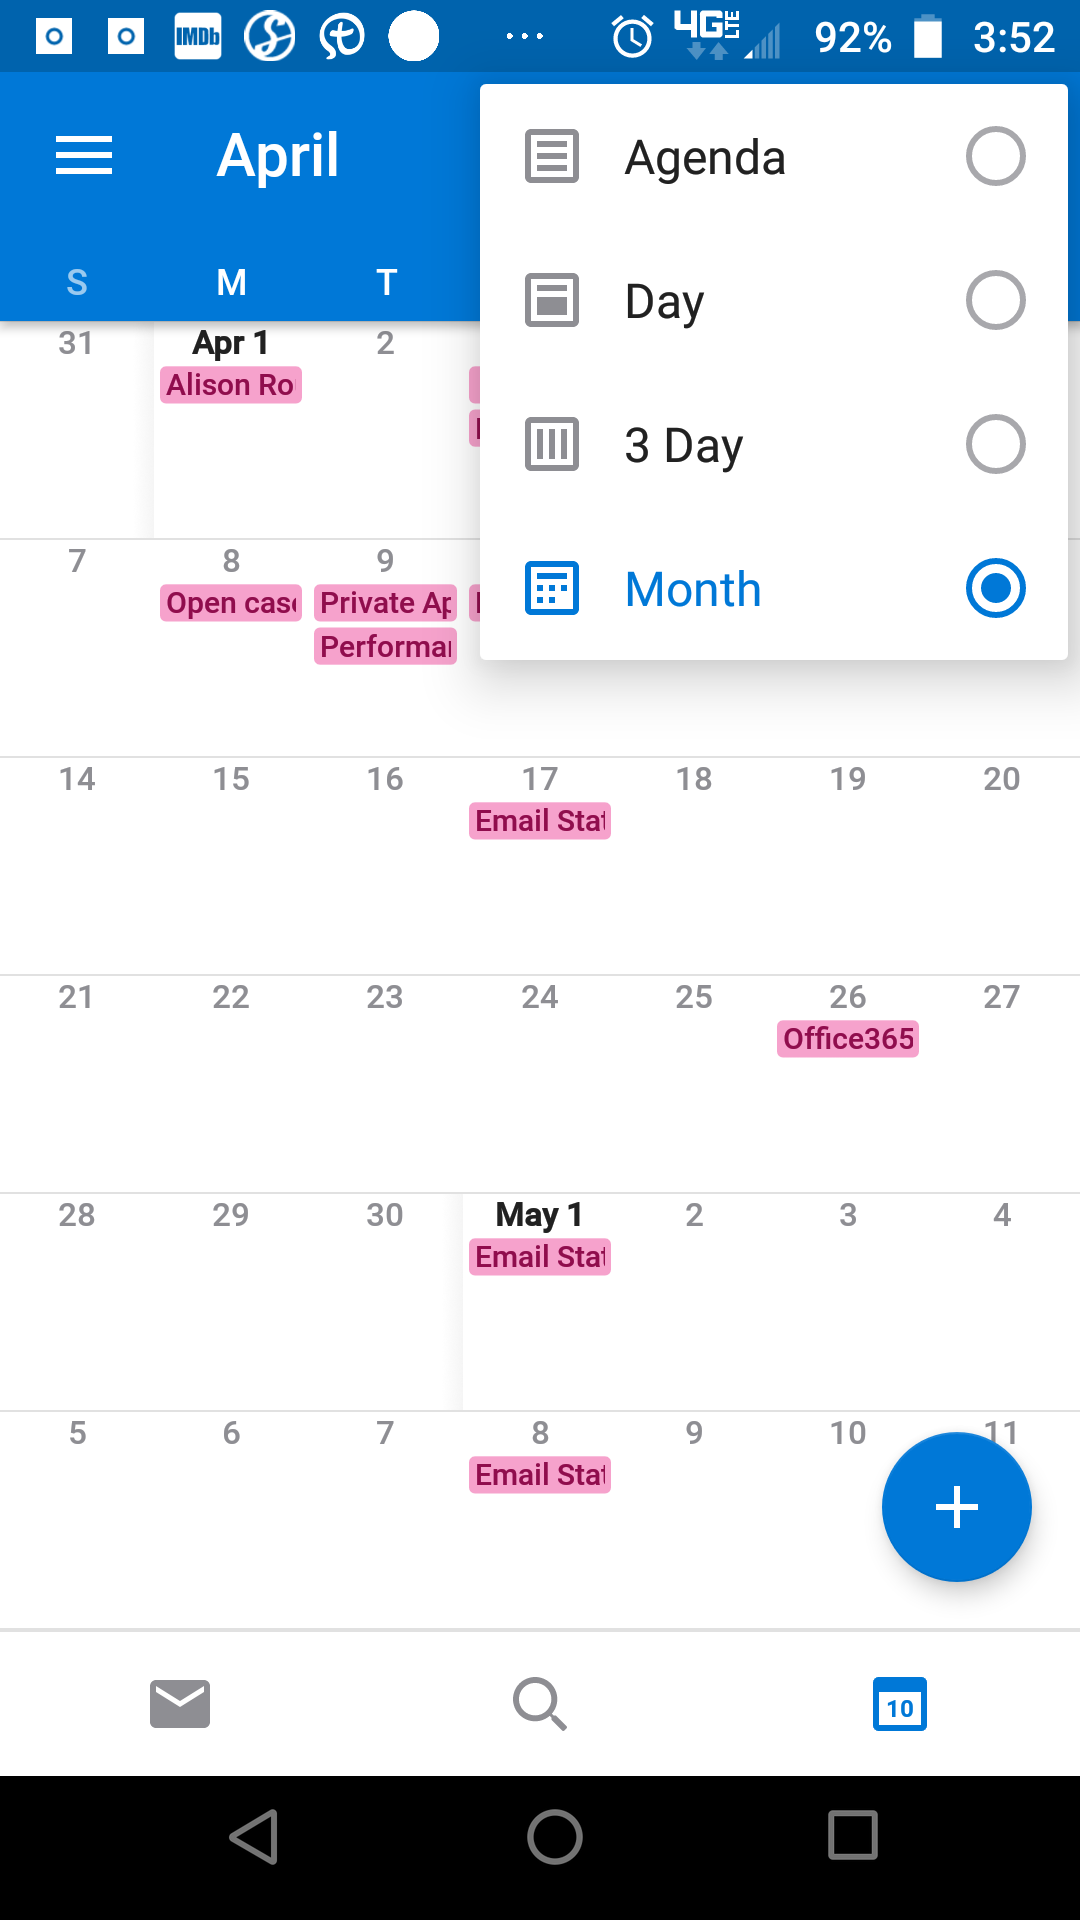
Calendar Views
- The last icon, to the far right, is the calendar icon. There is a view selector icon
in the top right corner that will allow you to show the calendar by the agenda, or
by day, by 3-day, or month views.
- Agenda View
While in Agenda View, you can easily pull down the calendar to switch to another day or scroll to another month.
Then push the calendar back up to see the agenda for that day.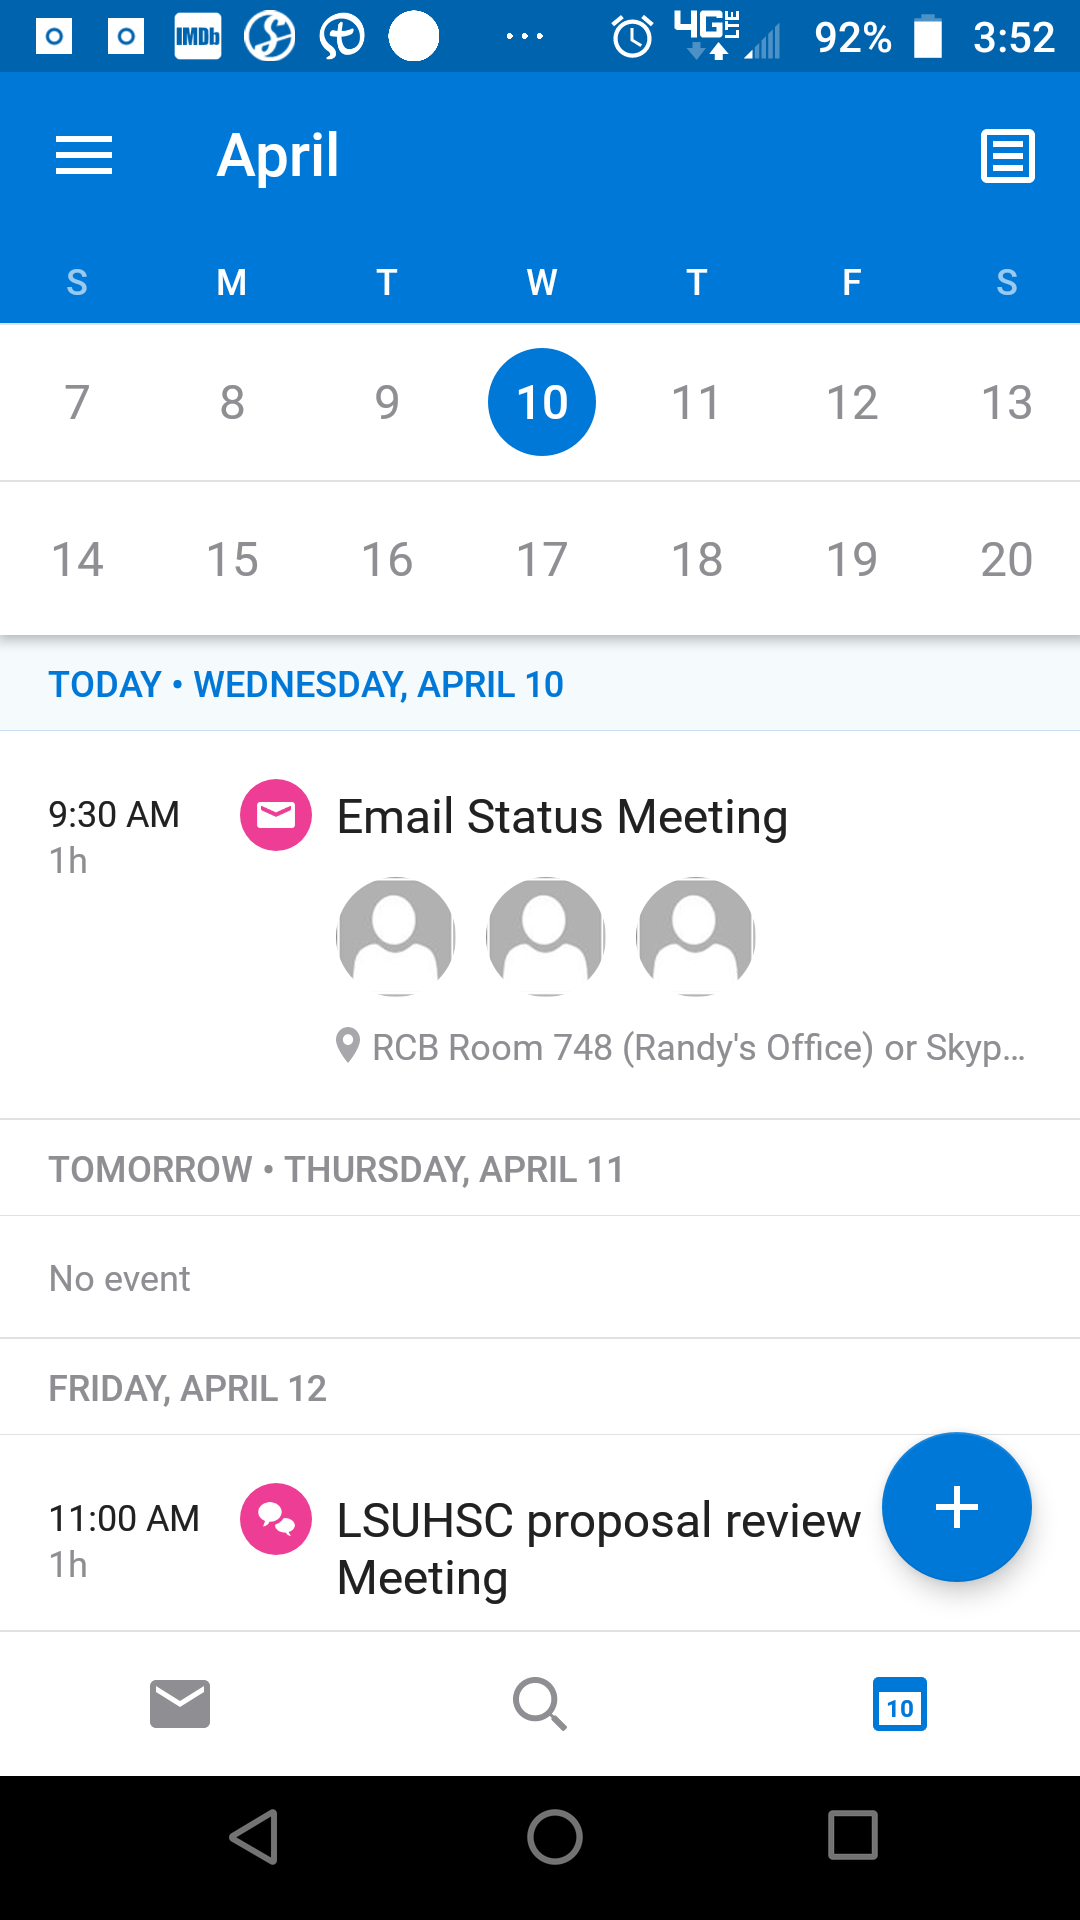
Day View
To select different dates in this view, pull down the date bar and scroll through the dates selecting the month and day to view.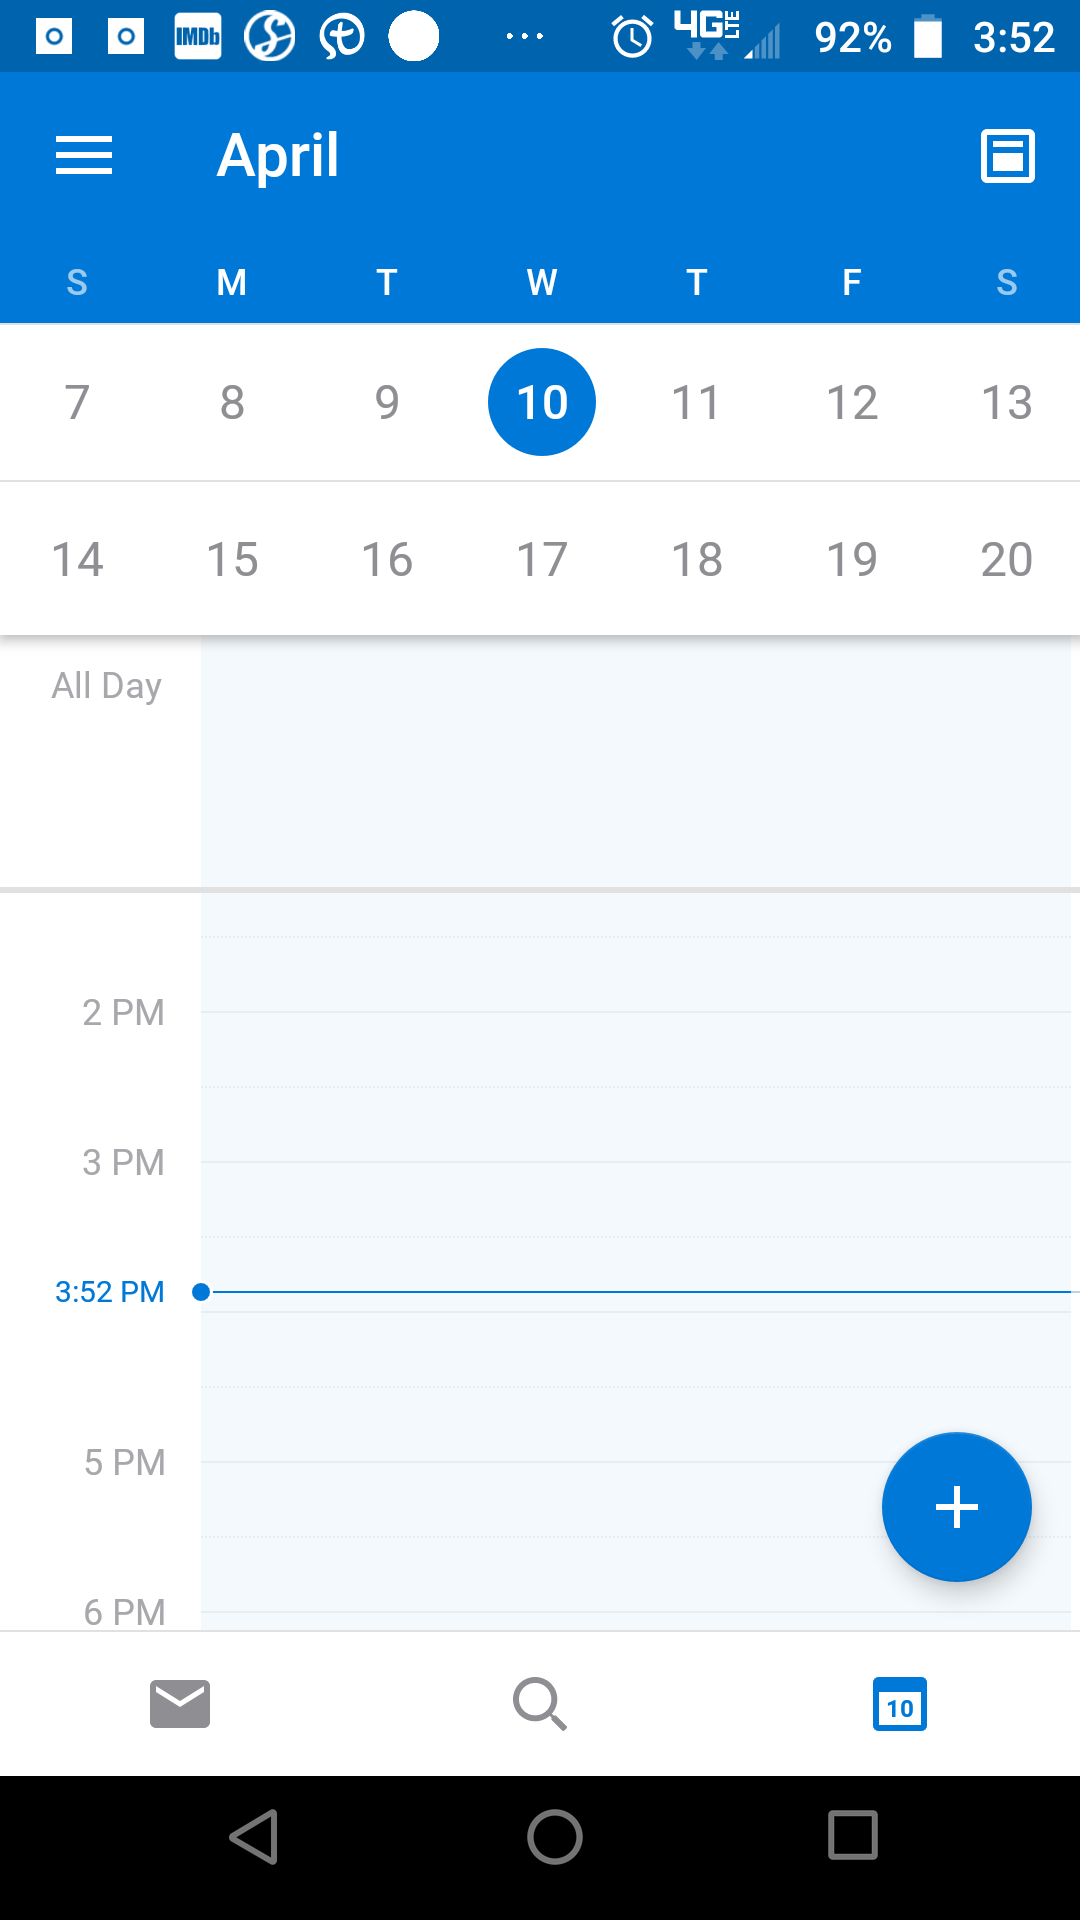
- 3 Day View
To select other dates in this view, scroll to the left or right.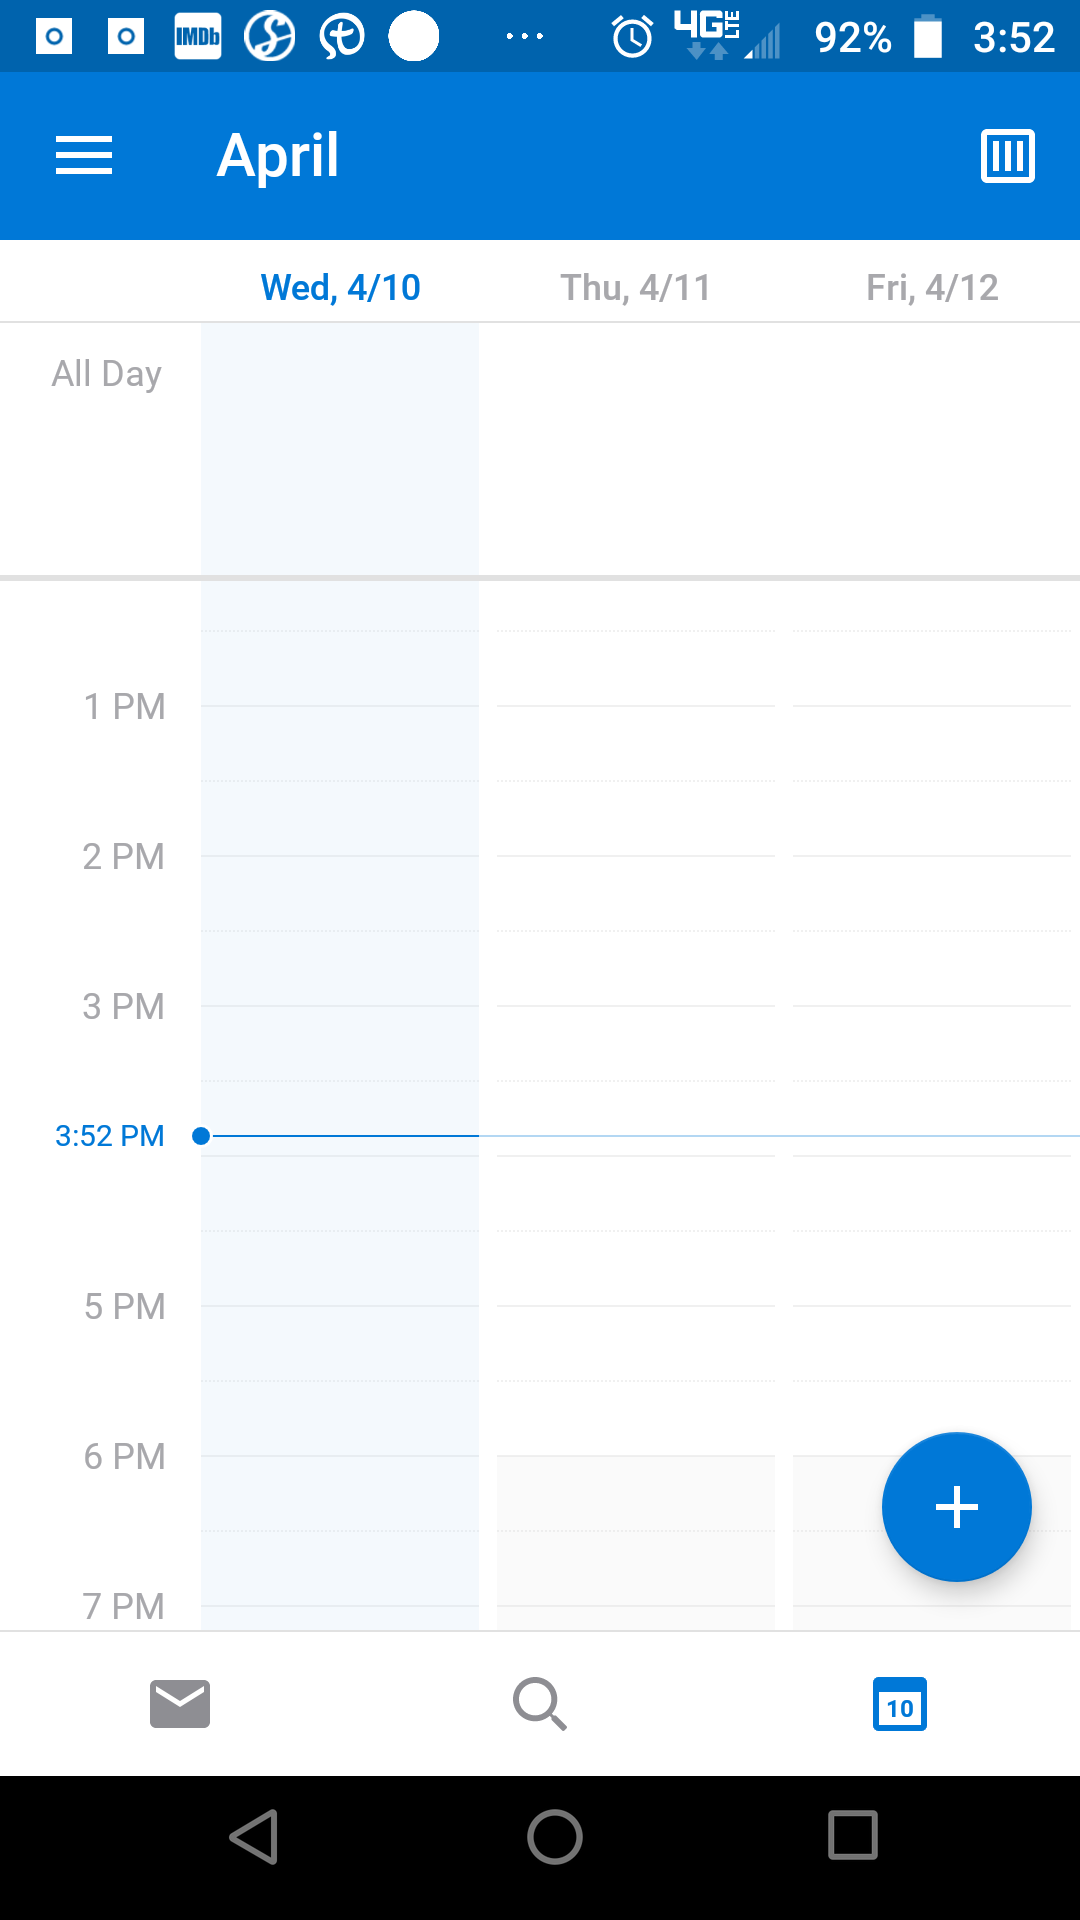
- 1 Month View
- To view other dates scroll up and down.

View Other Calendars
- From the main screen select the calendar icon.
- Select the hamburger menu in the upper left hand corner.
- Select the "Calendar +" icon in the upper left hand corner of the screen.
- Select “Add a shared calendar”.
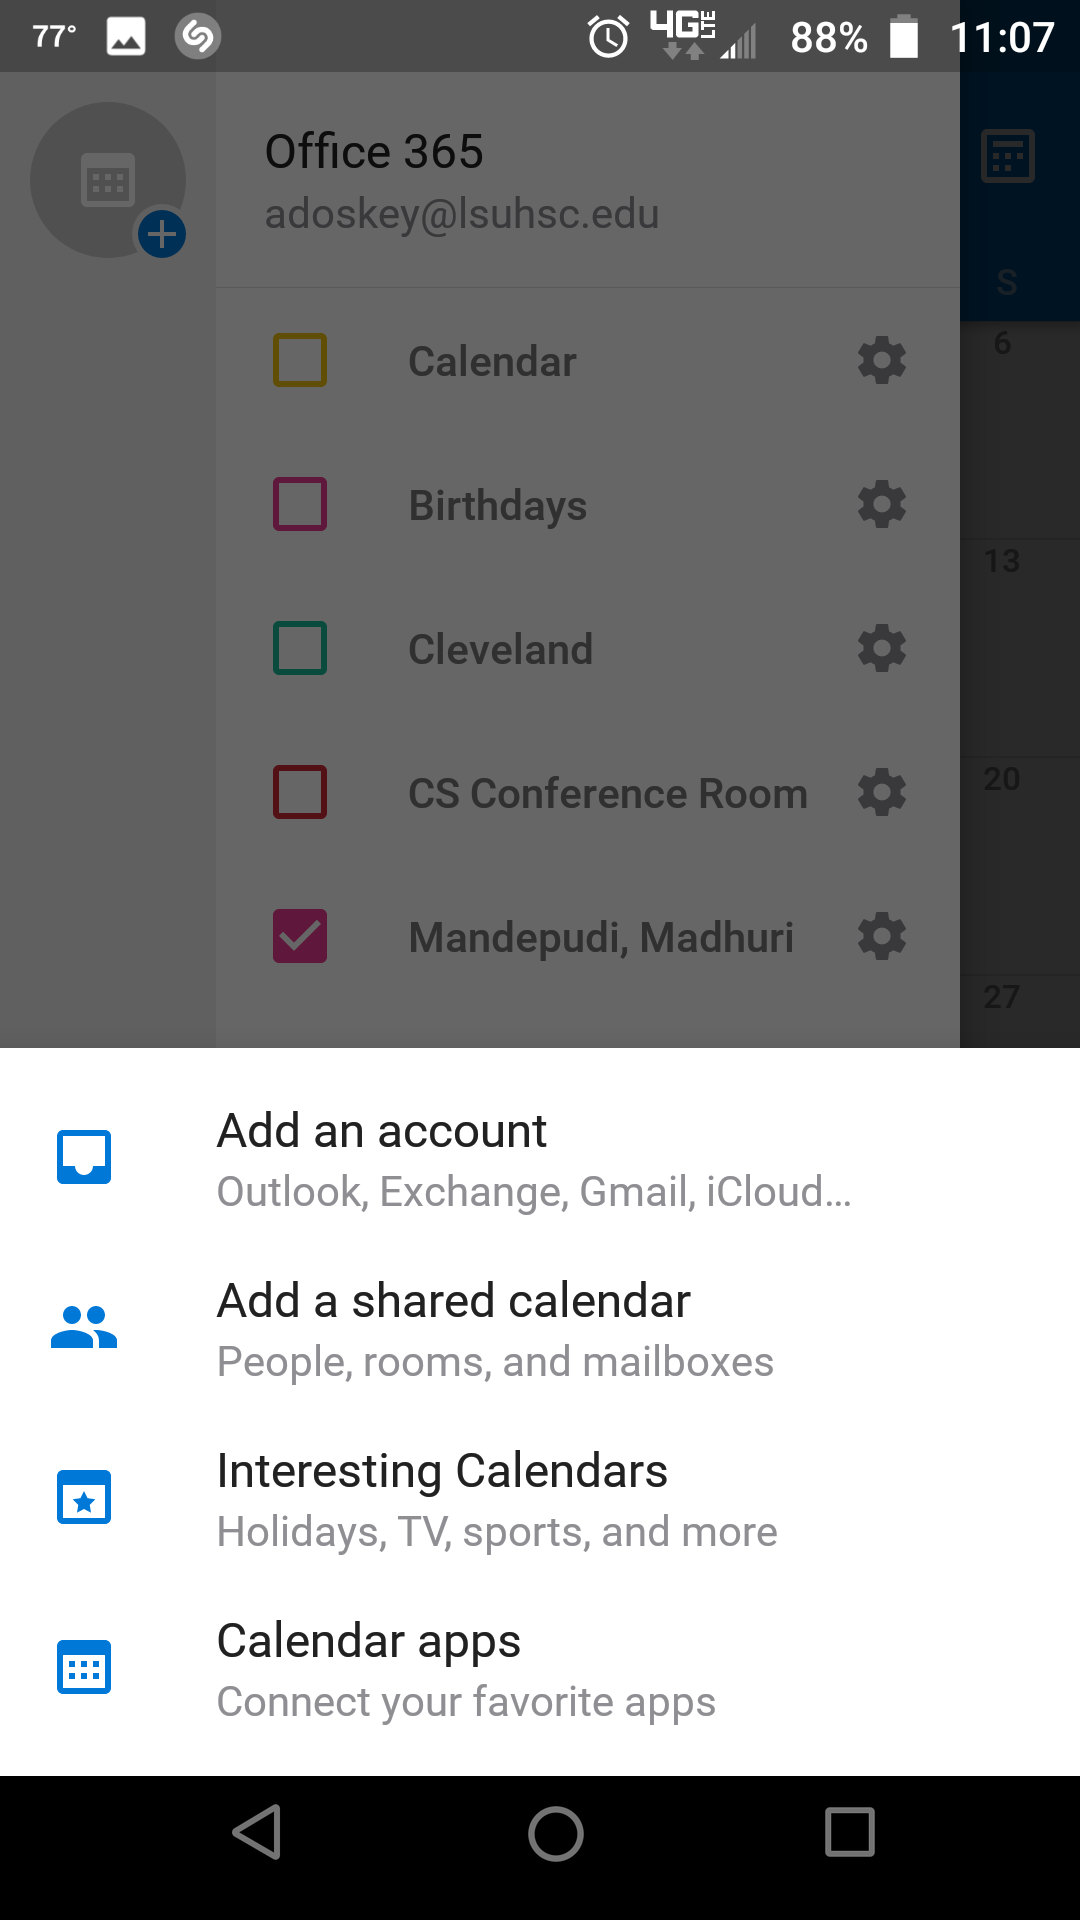
- Type in the first few letters of the name of the shared calendar, and a list will
appear. Select the calendar you want from the list.
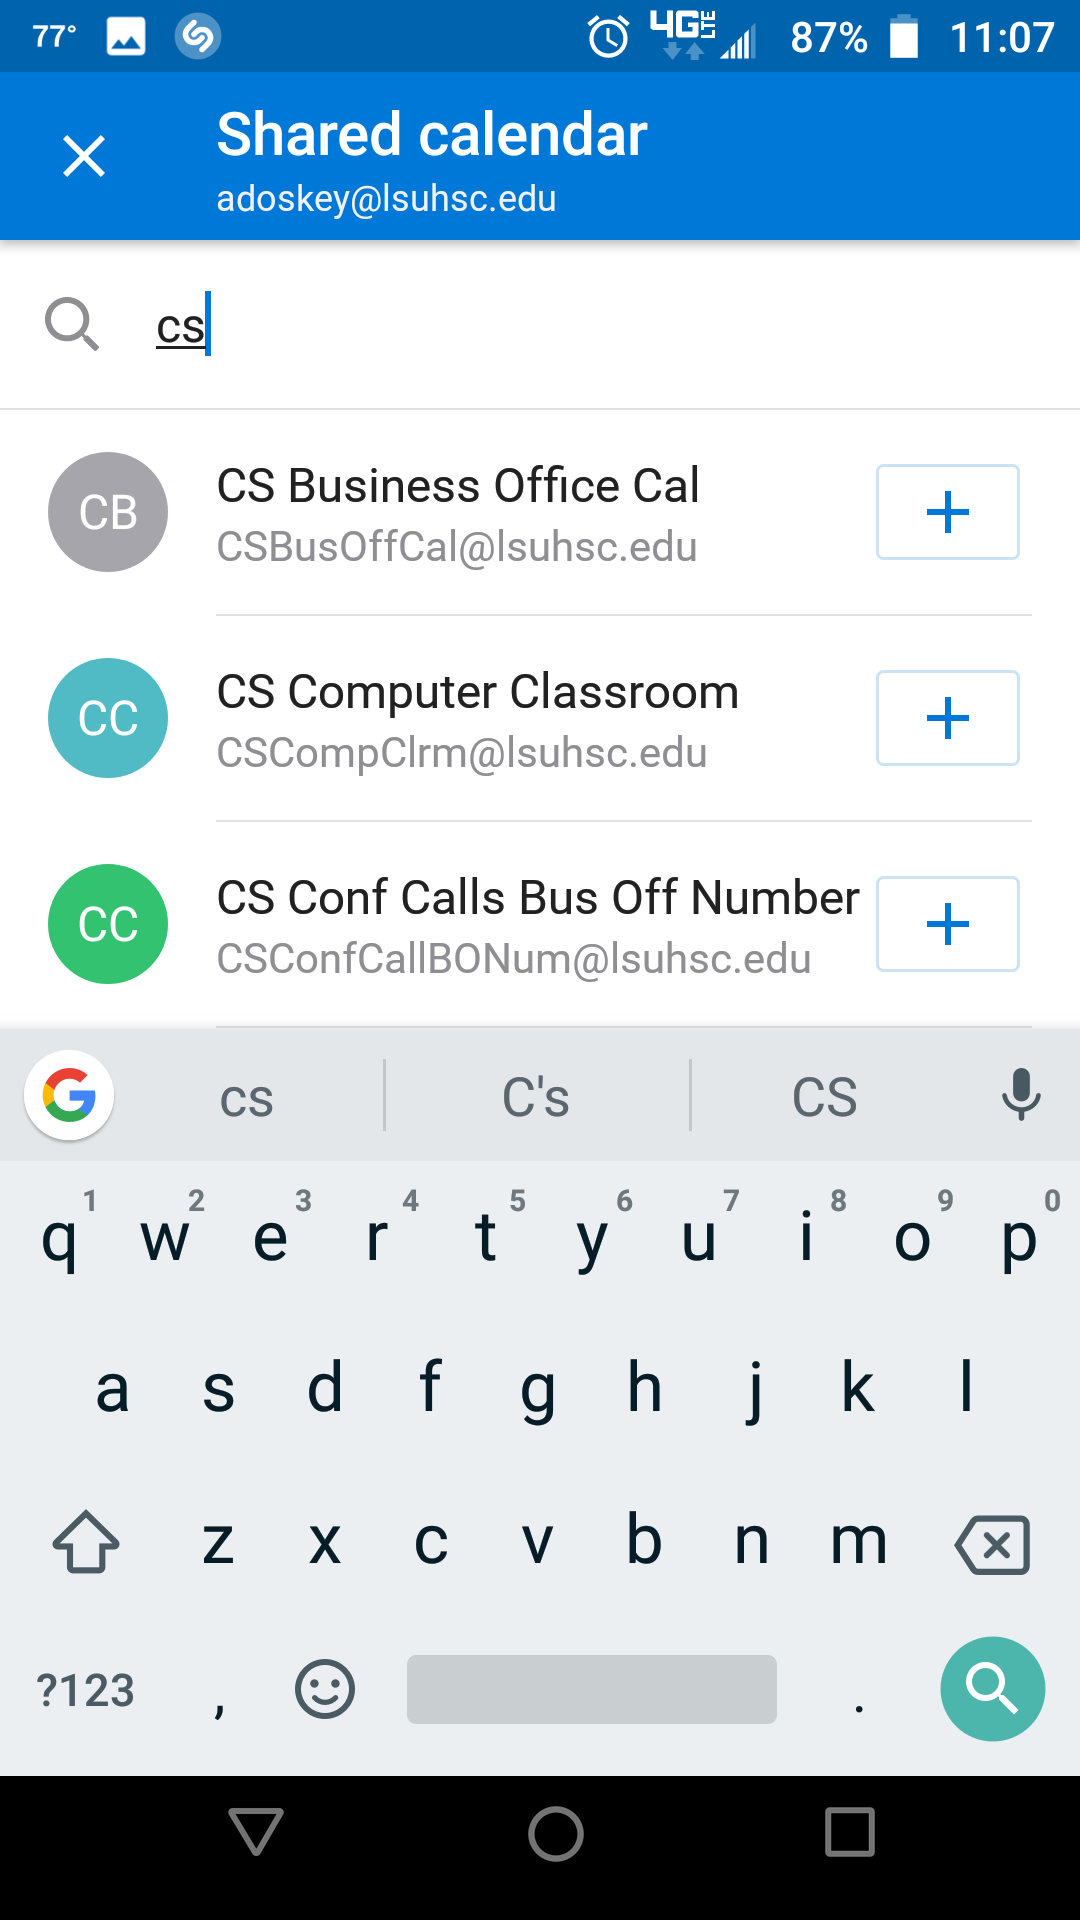
- Select the calendar and verify that you can view the contents.
Feedback:
Do you have a suggestion for improving Outlook for Android documentation? Please let us know.