Tables
1. Open an editable region.
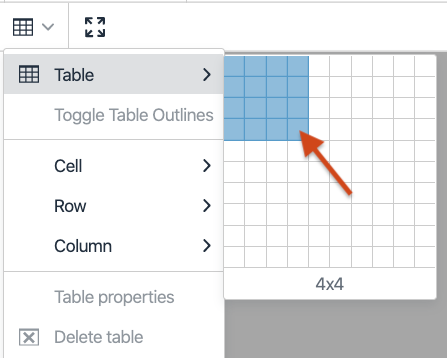
2. From the toolbar, click the Table icon ![]()
3. From the drop-down menu, click on the "Table" option.
4. Select the appropriate number of rows and columns by hovering over the grid.
2X2 table example:
5. Add desired content to the table.
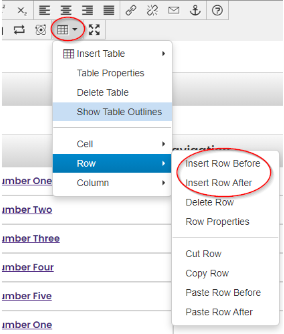
6. To add or remove rows and columns, click on the table icon in the tool-bar ![]() , click on "Row" or "Column" and click "Insert..."
, click on "Row" or "Column" and click "Insert..."
7. To adjust the table, Right click on the table and select Table Properties.

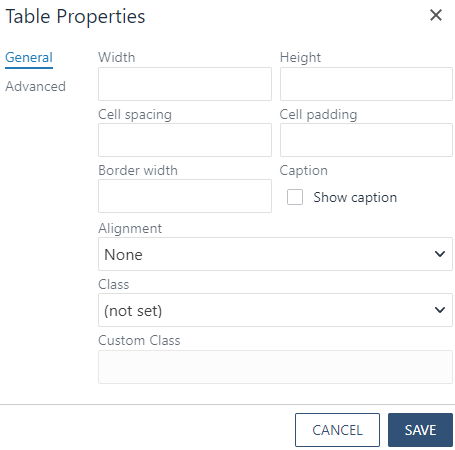
8. The "Table Properties" option allows users to specify the following:
- Width: Width of the table, in pixels
- Height: Height of the table, in pixels
- Cell spacing: Space between cells, in pixels
- Cell padding: Space inside cells between the border and the content, in pixels
- Border: Thickness of cell borders, in pixels
- Show Caption: Addition of space for a caption above the table
- Alignment: Alignment of the table on the page "Left," "Center," "Right," or "None"
- Class: Styling for the table
9. Click Save.
![]()
10. Publish to view the changes in the live site.
![]()
Example of a 3X3 table with filled content:
| Item No. | Topic One | Topic Two |
| 1 | Contact Us | News |
| 2 | Directory | Events |